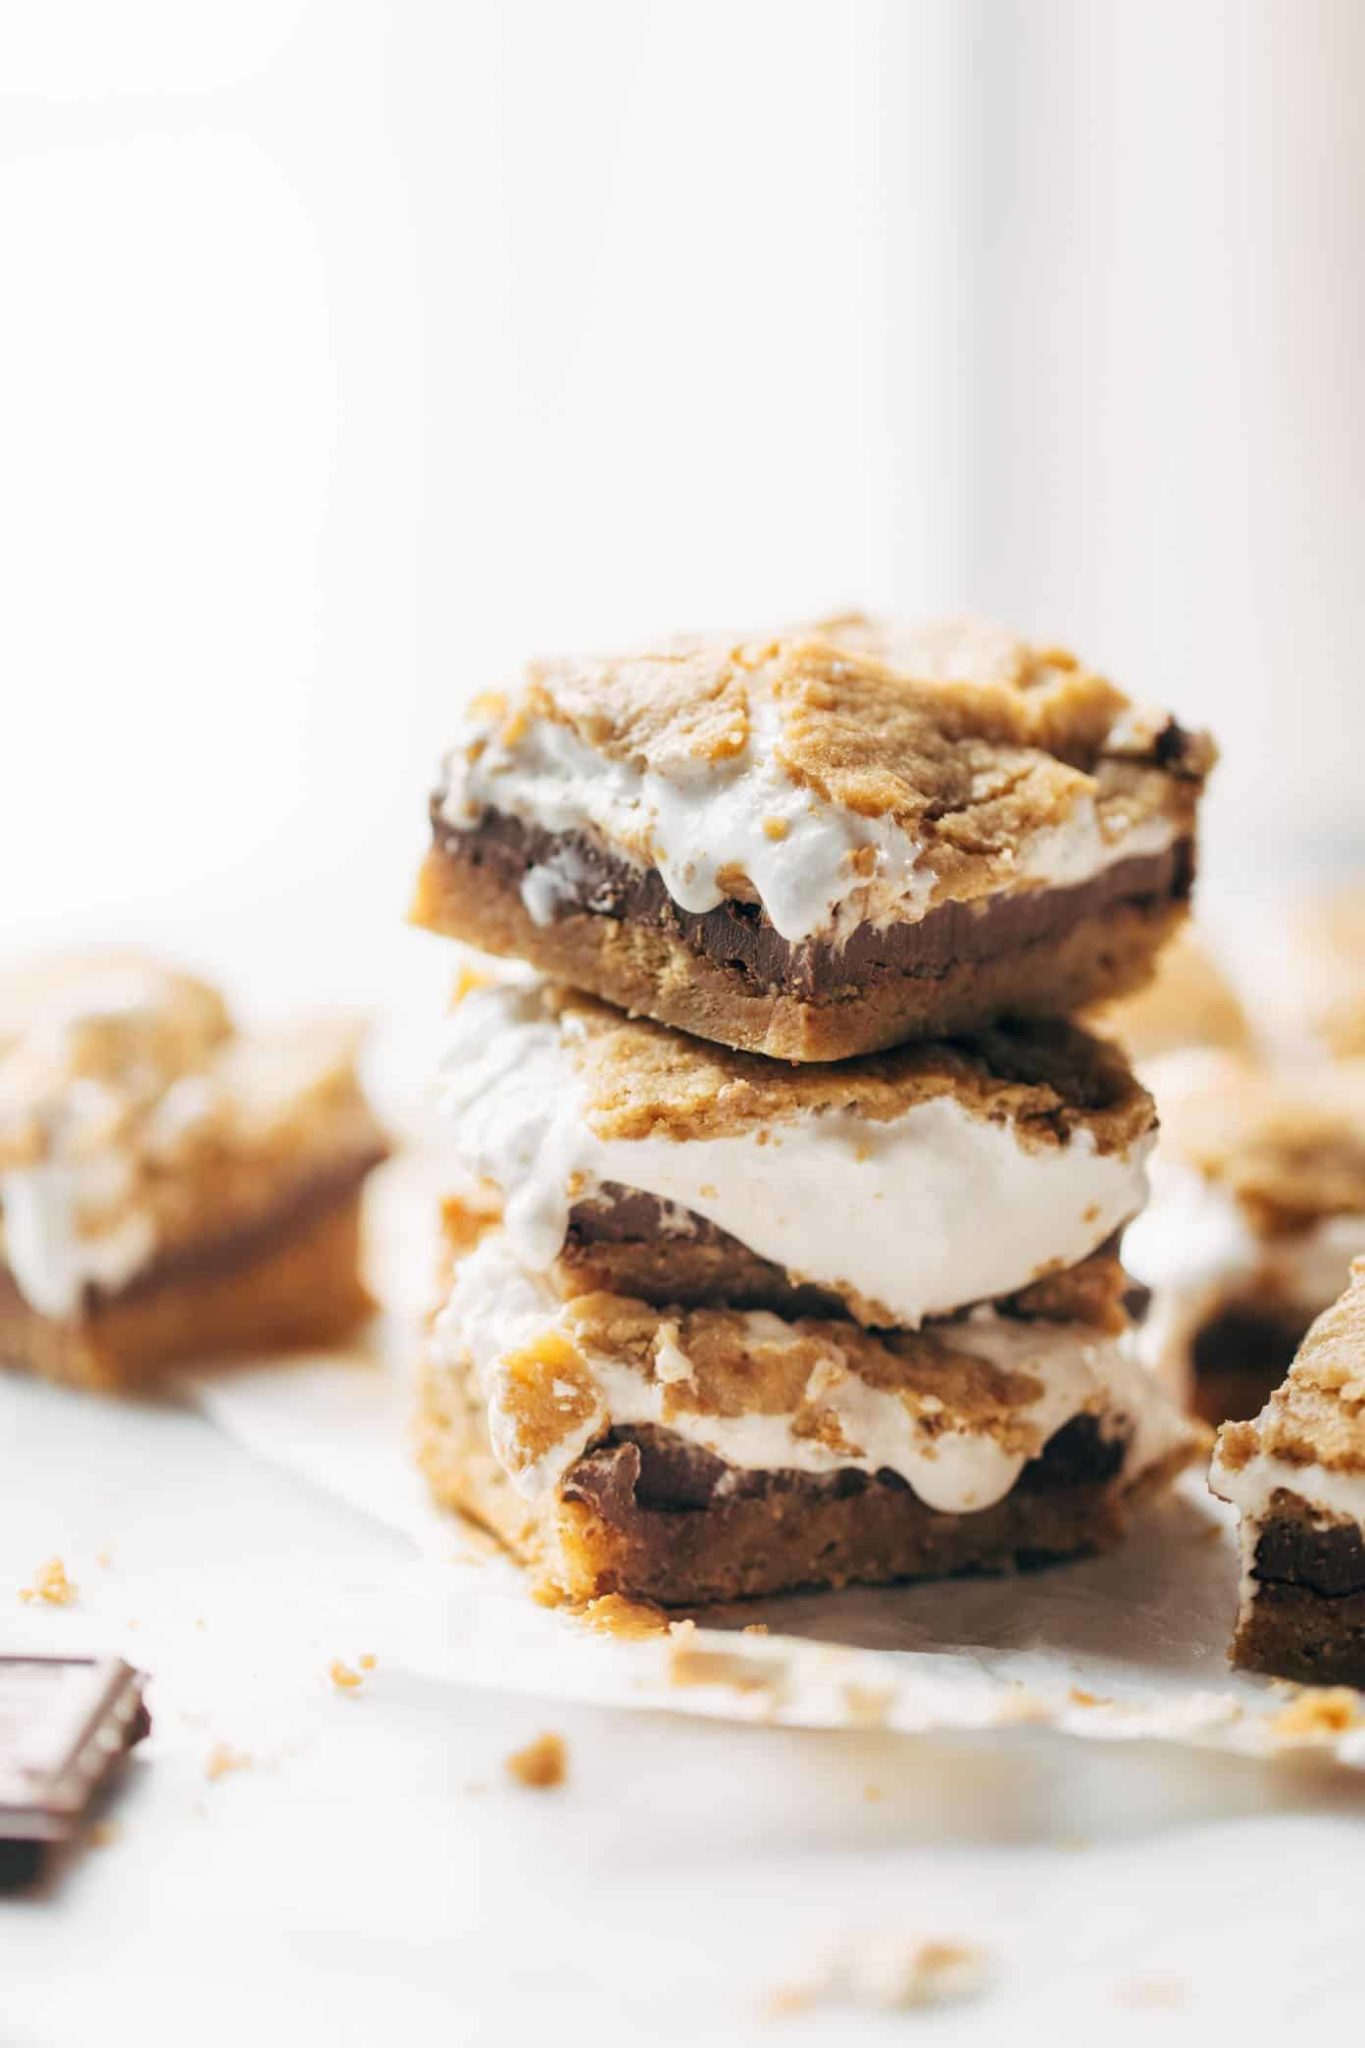
Capture all the nostalgic flavors of campfire s’mores without the need for an open flame with these irresistible S’mores Bars. This easy s’mores recipe transforms the classic combination of graham crackers, chocolate, and toasted marshmallows into a convenient, shareable dessert that’s perfect for any occasion. With a buttery graham cracker crust, a rich chocolate layer, and a golden, gooey marshmallow topping, these s’mores dessert bars deliver all the satisfaction of traditional s’mores in an easy-to-serve format.
Whether you’re hosting a summer barbecue, need a crowd-pleasing potluck dessert, or simply craving that iconic s’mores flavor year-round, these homemade s’mores bars are the answer. No campfire required—just your oven and a few simple ingredients stand between you and s’mores perfection.
Why You’ll Love These S’mores Bars
No Campfire Needed
Enjoy authentic s’mores flavor any time of year, regardless of weather or access to outdoor fire pits. These indoor s’mores are just as delicious as the original.
Easy to Serve
Unlike traditional s’mores, these bars cut into perfect portions with no mess or fuss. They’re ideal for party desserts and gatherings where serving individual s’mores would be impractical.
Consistent Results Every Time
No more burnt marshmallows or unmelted chocolate. These s’mores dessert bars deliver perfect texture and flavor in every single bite.
Make-Ahead Friendly
Prepare these s’mores brownies ahead of time and store them for events, making party planning easier and stress-free.
Kid-Friendly and Crowd-Pleasing
The familiar flavors make these s’mores treats a hit with all ages. Kids especially love the gooey marshmallow topping.
Customizable
Easily adapt this s’mores bar recipe with different chocolates, extra toppings, or creative variations to suit your preferences.
Ingredients for Best S’mores Bars
For the Graham Cracker Crust
- 2 cups graham cracker crumbs (about 14-16 full graham crackers)
- ½ cup unsalted butter, melted
- ¼ cup granulated sugar
- ¼ teaspoon salt
For the Chocolate Layer
- 2 cups semi-sweet chocolate chips
- 1 cup milk chocolate chips
- 1 (14-ounce) can sweetened condensed milk
- 2 tablespoons unsalted butter
- 1 teaspoon vanilla extract
- ⅛ teaspoon salt
For the Marshmallow Topping
- 4 cups mini marshmallows (or 16-20 large marshmallows, cut in half)
- 2 tablespoons butter, melted (for brushing)
Optional Additions
- 1 cup chocolate chunks (for extra chocolate)
- ½ cup chopped chocolate bars (like Hershey’s)
- Graham cracker pieces for topping
- Sea salt for sprinkling
Step-by-Step Instructions
Making the Graham Cracker Crust (10 minutes)
Step 1: Prepare Your Pan
Preheat your oven to 350°F (175°C). Line a 9×13-inch baking pan with parchment paper, leaving an overhang on the sides for easy removal. This creates perfect s’mores squares every time.
Step 2: Make Graham Cracker Crumbs
Crush graham crackers into fine crumbs using a food processor, or place them in a sealed plastic bag and crush with a rolling pin. You want fine, even crumbs for the best graham cracker crust.
Step 3: Combine Crust Ingredients
In a medium bowl, mix graham cracker crumbs, melted butter, sugar, and salt until the mixture resembles wet sand and holds together when pressed.
Step 4: Press Into Pan
Pour the crumb mixture into your prepared pan. Using the bottom of a measuring cup or your hands, press firmly and evenly across the bottom of the pan. Pack it tightly to prevent crumbling later.
Step 5: Pre-Bake the Crust
Bake for 8-10 minutes until the crust is lightly golden and fragrant. This step ensures a sturdy base that won’t become soggy under the chocolate layer. Remove from oven and set aside.
Creating the Chocolate Layer (15 minutes)
Step 6: Melt the Chocolate
In a medium saucepan over low heat, combine chocolate chips, sweetened condensed milk, and butter. Stir constantly until completely smooth and melted. Alternatively, use a double boiler for more gentle, controlled melting.
Step 7: Add Flavor
Remove from heat and stir in vanilla extract and salt. The salt balances the sweetness and enhances the chocolate flavor in these chocolate s’mores bars.
Step 8: Pour Over Crust
Pour the melted chocolate mixture over the pre-baked graham cracker crust. Use an offset spatula to spread evenly, reaching all corners. Tap the pan gently on the counter to release air bubbles.
Step 9: Let It Set
Allow the chocolate layer to cool at room temperature for 10-15 minutes, or refrigerate for 5 minutes. This prevents the marshmallows from sinking when added.
Adding the Marshmallow Topping (10 minutes)
Step 10: Arrange Marshmallows
Evenly distribute mini marshmallows over the chocolate layer, covering the entire surface. If using large marshmallows, cut them in half and place cut-side down for better toasting.
Step 11: Brush with Butter
Lightly brush the marshmallows with melted butter. This helps them achieve that golden, toasted appearance reminiscent of campfire s’mores.
Step 12: Broil to Perfection
Turn your oven to broil (high setting). Place the pan on the middle rack and broil for 1-3 minutes, watching constantly. The marshmallows should turn golden brown with some darker spots. Rotate the pan if needed for even browning.
Important: Never leave the oven while broiling—marshmallows can go from perfect to burnt in seconds!
Step 13: Cool Completely
Remove from oven and let cool completely at room temperature, then refrigerate for at least 2 hours or until the chocolate layer is firm. This makes cutting clean bars much easier.
Step 14: Cut and Serve
Using the parchment paper overhang, lift the entire dessert from the pan. Place on a cutting board. Use a sharp knife, wiping it clean between cuts, to slice into bars. For the cleanest cuts, run your knife under hot water and dry it before each slice.
Expert Tips for Perfect S’mores Bars
Use a Kitchen Torch
For ultimate control over marshmallow toasting, use a kitchen torch instead of broiling. This allows you to toast each marshmallow individually to your preferred level of doneness.
Don’t Skip the Parchment Paper
Parchment paper with overhang makes removing and cutting these s’mores cookie bars infinitely easier. It’s a small step that saves major headaches.
Let Chocolate Set Properly
If you add marshmallows to warm chocolate, they’ll sink. Give the chocolate layer time to firm up slightly for the best presentation in your layered s’mores bars.
Watch the Broiler Like a Hawk
Marshmallows burn quickly under the broiler. Set a timer for 1 minute and check constantly. Perfect toasting can happen in 30 seconds, while burning takes just moments longer.
Use Quality Chocolate
Since chocolate is a primary flavor, use good quality chips or chopped chocolate bars. The better the chocolate, the better your gourmet s’mores bars will taste.
Chill Before Cutting
Fully chilled bars cut much cleaner than room temperature ones. For the prettiest presentation, patience is essential when making these s’mores brownies.
Consider a Hot Knife
For professional-looking cuts, heat your knife under hot water, dry it thoroughly, then make each cut. Reheat between cuts for consistently clean edges.